Script of the Day: Exporting labelled images
Export annotations as labelled images, using tiling if needed.
Yesterday’s scripts showed how to export binary masks from annotations, and also to import masks to create new annotations.
Today, we look at a slightly more sophisticated export to create labelled images, which are optionally also tiled.
Problem
Annotations often have meaningful classifications. When exporting these annotations, it’s helpful to preserve the classifications somehow.
Rather than creating a binary mask for each annotation (black & white), it can be preferable to export the full image where the pixel value in the mask is an integer that relates to the classification of the annotation. This is a labelled image.
This method of export only really makes sense if annotations are non-overlapping. Today’s scripts does not deal with overlapping annotations; if this is an issue, then it would be better to return to exporting binary masks separately for each classification.
One problem that can occur when doing such an export is that it’s necessary to write an image that is too big.
QuPath can’t currently write pyramidal whole slide images - but it can write out individual regions as separate image tiles. This at least gets the information out, and gives the opportunity to seek some way of combining the tiles elsewhere.
Solution
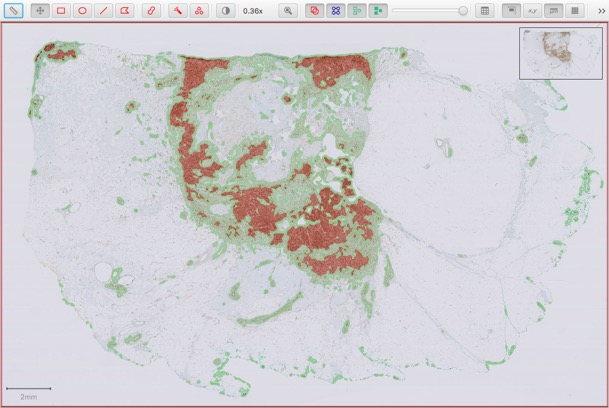
The image below shows an annotated whole slide image:

And here is a visualization of the results after running the script below:

Each square (or rectangle) in the bottom figure shows a separate exported image (a ‘tile’).
The image pixels are written (left), and the annotations also written separately as labelled images (right).
Entire script
Bonus script: Adapted version for Tissue Microarrays
A similar approach to exporting can also be applied to tissue microarrays - with a few modifications.
Here, it helps to export one core at a time and to preserve the name of the core.