QuPath v0.2.0-m4 now available
Fourth milestone on the path to QuPath v0.2.0
QuPath v0.2.0-m4 is now online!
As usual, many changes while moving towards the next release. Here’s an overview of the main ones.
Please report bugs on GitHub - and for all other questions or discussions please use image.sc.
Cell detection & intensity measurements
The Positive cell detection command is no longer just for hematoxylin & DAB staining. It can now be used for any brightfield or multiplexed image where ‘positive’ cells can be identified with a single feature.
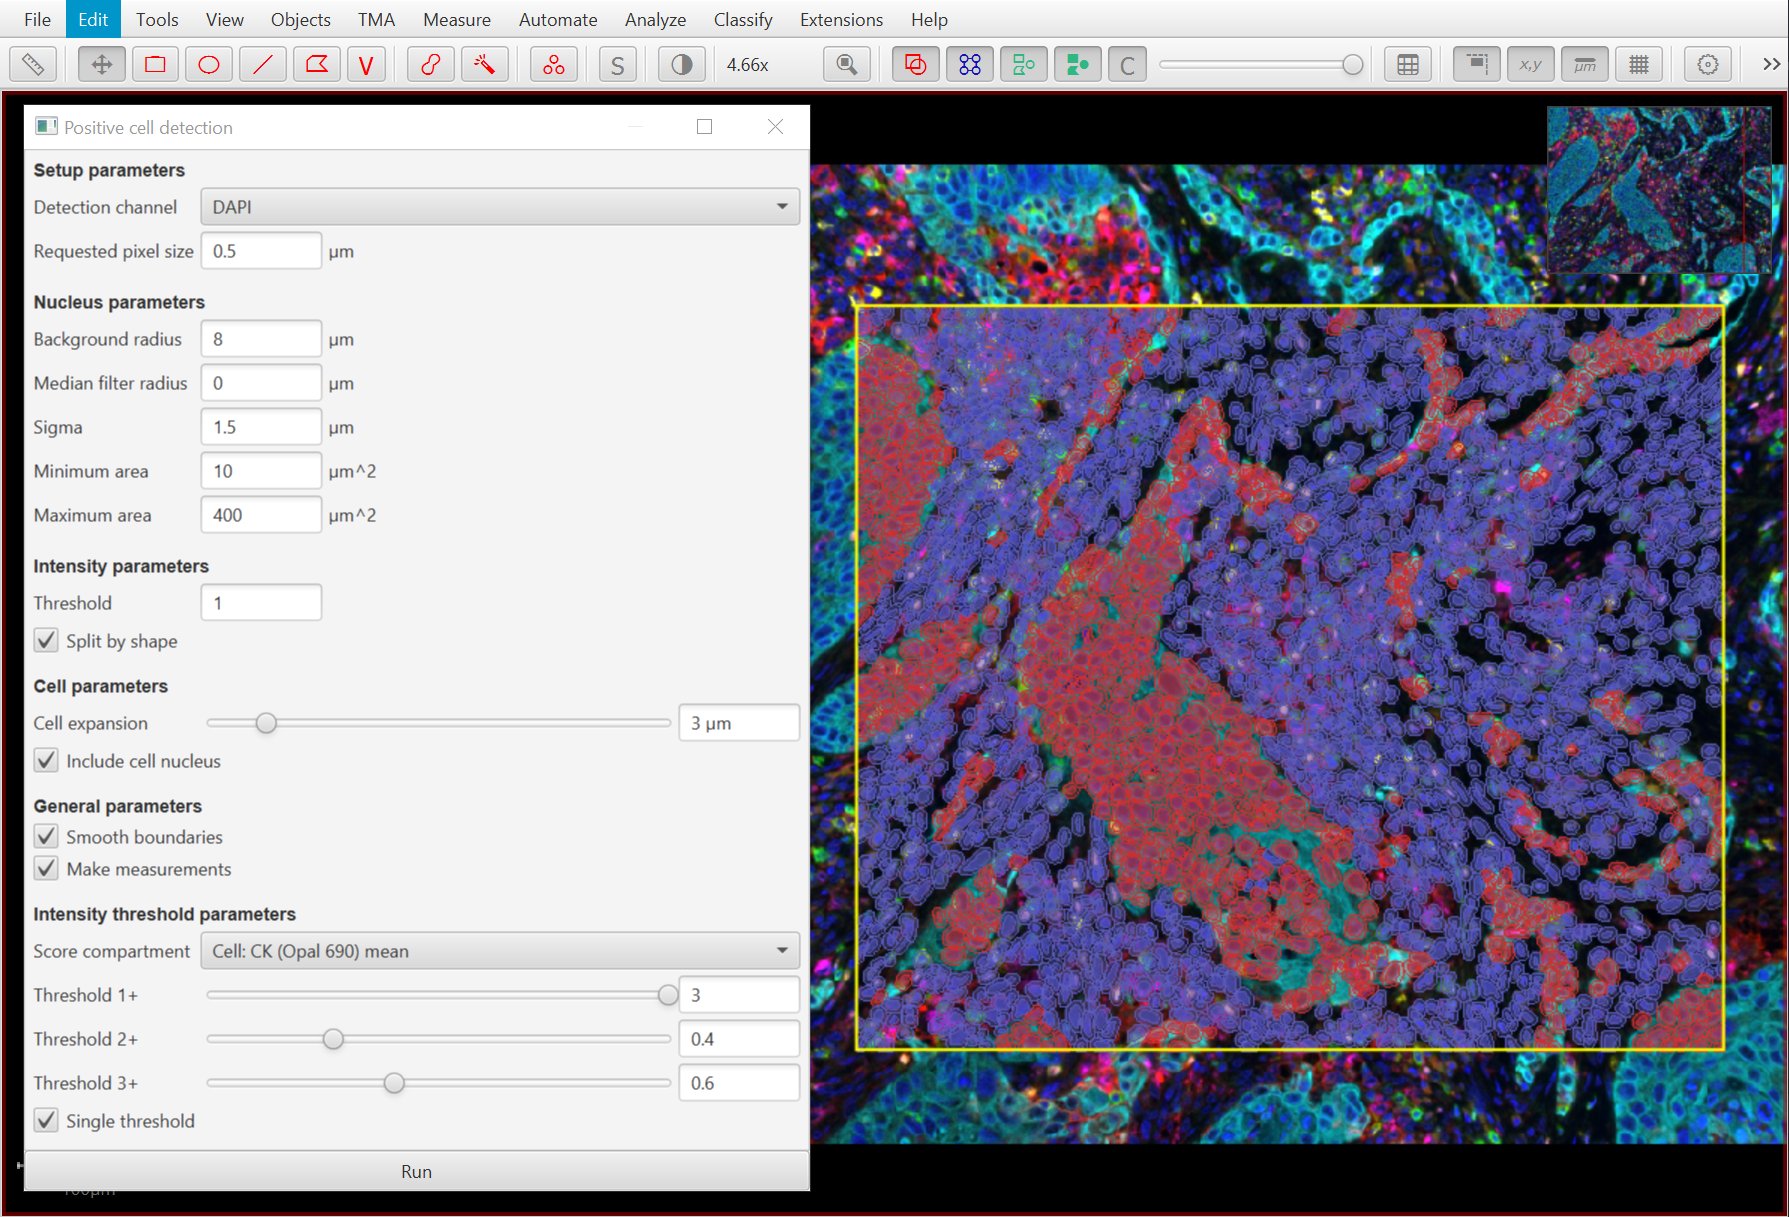
Original TIFF image if LuCa-7color_[13860,52919]_1x1component_data.tif from Perkin Elmer, part of the Bio-Formats sample data available under CC-BY 4.0.
As part of these changes, both Positive cell detection and Add intensity measurements now use channel names rather than numbers*.
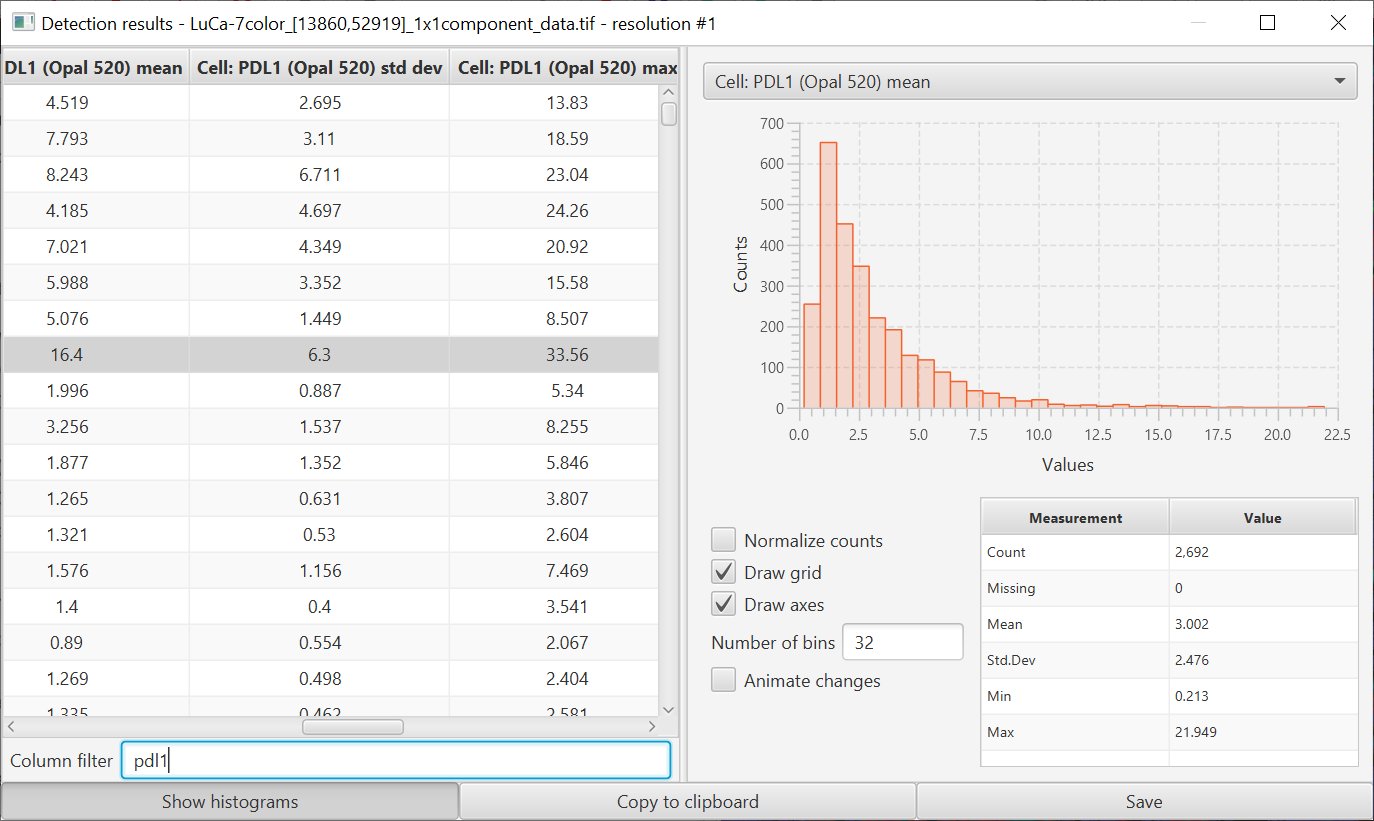
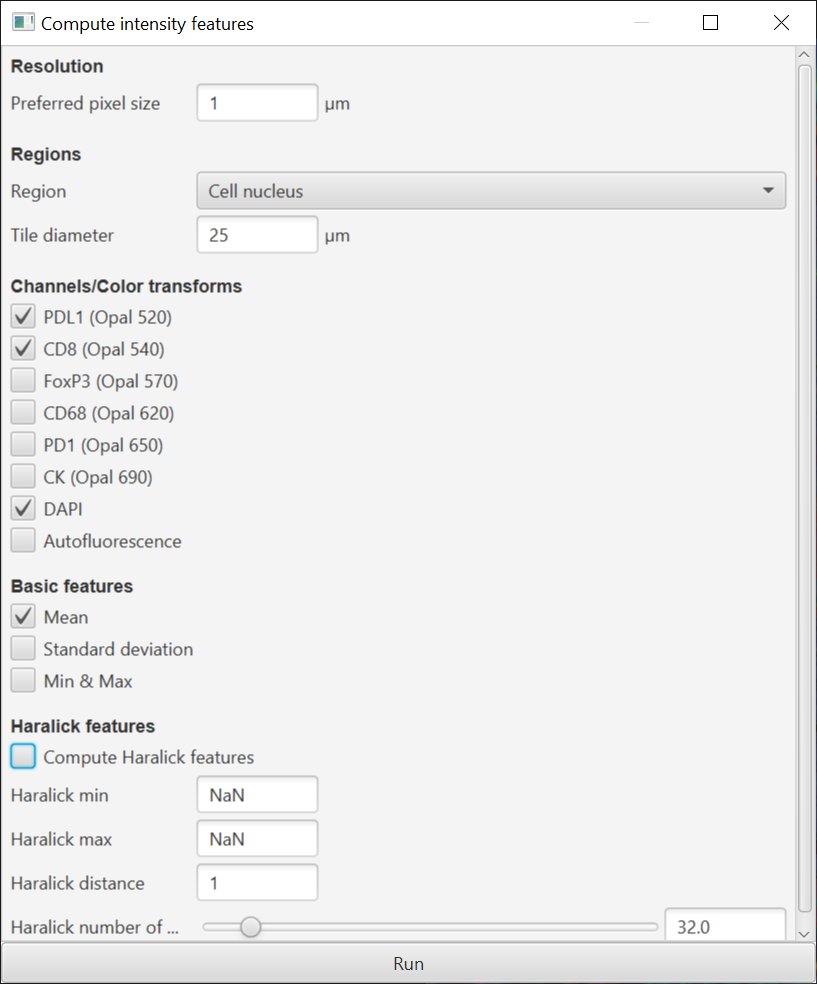
This should make it rather a lot easier to decipher measurements later. The intensity command has also been adjusted to allow measurements (including textures) to be calculated within the cell nucleus only.
*-Be especially cautious when scripting - Add intensity measurements still uses channel order in scripts.
(Also, please avoid using scripts recorded using old versions of QuPath because of these changes.) -*
Generate image pyramids from separate fields of view
Perhaps the most exiting feature for anyone working with multispectral images…
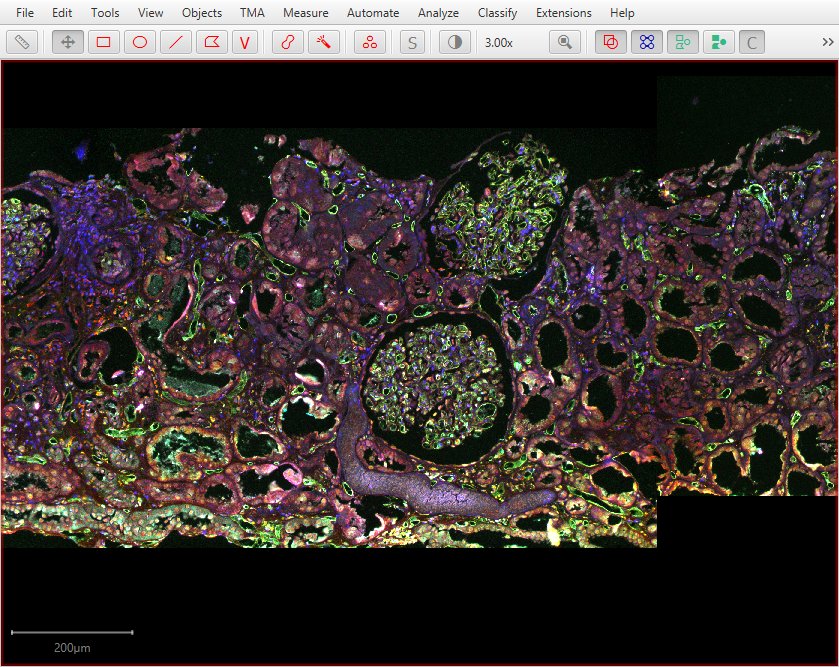
A new QuPath script is able to merge separate spectrally-unmixed fields of view from a Vectra® Polaris™ system, and output a multichannel, pyramidal OME-TIFF.
So starting from a single field of view…

…it is possible to merge multiple fields of view…
…even resulting in a full whole slide image.
For this to work it is not necessary for all fields of view to be present. If part of the image is not scanned the pixel values in all channels will simply be 0.
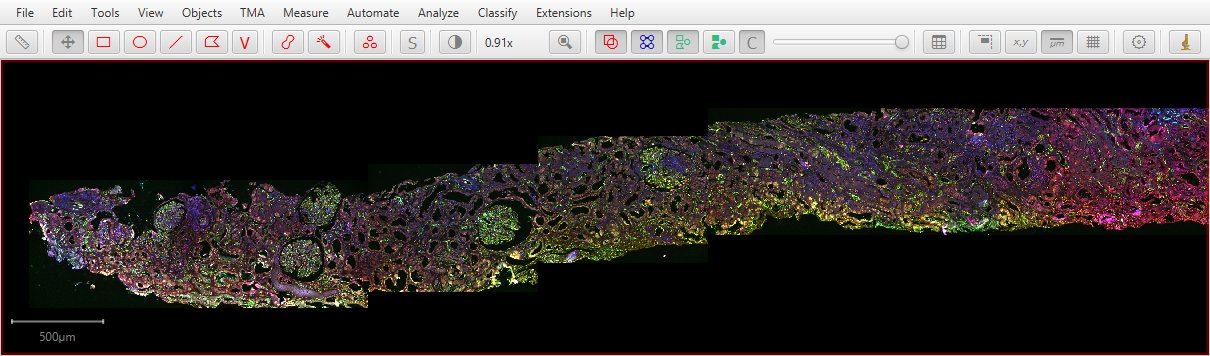
Original images shown above thanks to Dr Sandrine Prost, University of Edinburgh.
The script is here. If it proves useful enough, it might become a built-in feature in a future release.
More options when importing images to projects
v0.2.0-m3 introduced a new image import dialog when working with projects, and the ability to drag & drop multiple images for import.
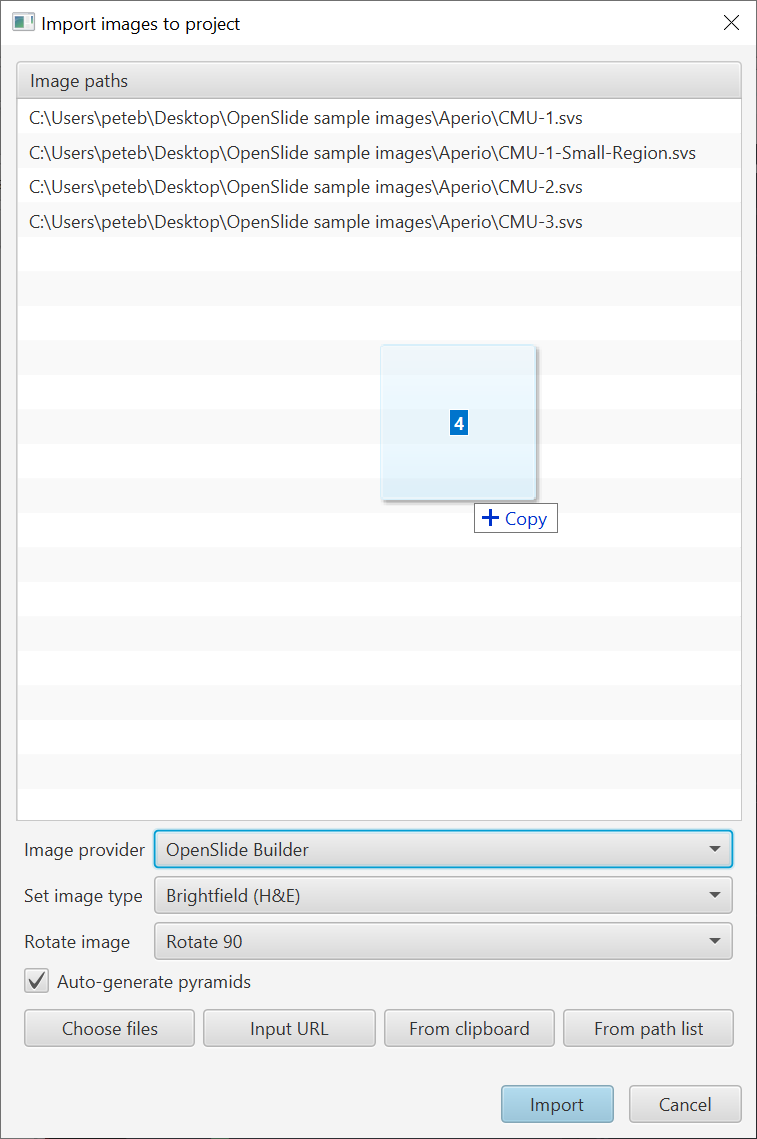
One of the options is to rotate the image. The option existed in m3… in m4 it actually works.

This differs from View → Rotate image, which is really only for visualization. Rotation on import treats the image as if it had been saved in a rotated way (i.e. with coordinates changed accordingly). It is designed to resolve cases, especially with Tissue Microarrays, where the image is oriented unexpectedly.
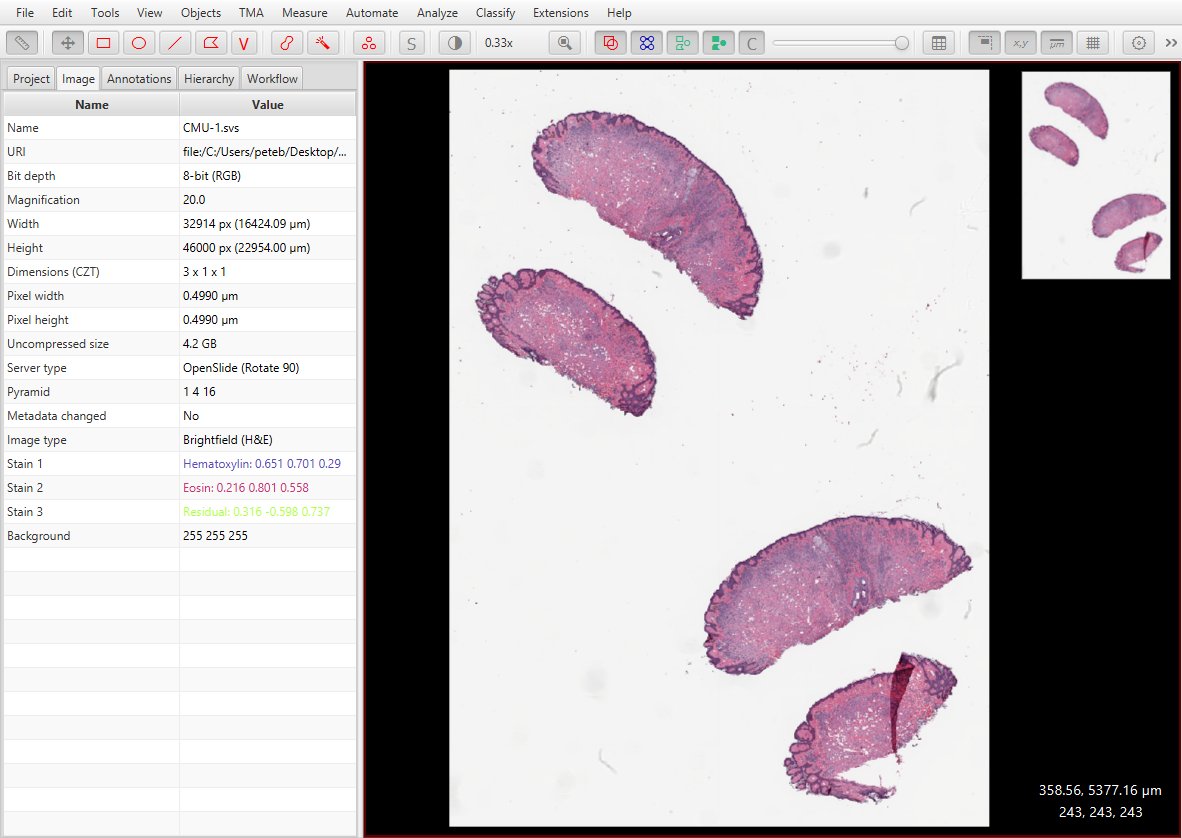
In general, you really need to set the Image type in QuPath before doing any analysis, since some commands (e.g. cell detection) change behavior based on the type. This can be auto-estimated (you can turn this on/off in the preferences), but it’s wise to take control since the estimate might be wrong.
You could always set the type later by double-clicking on the entry under the ‘Image’ tab:
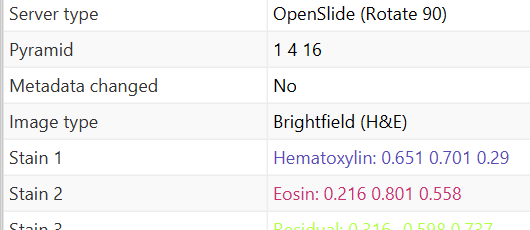
Now you can - and probably should - specify the type in the import dialog.

You can also now specify the ‘server type’ or ‘image provider’ (same thing). Basically, this is the library that reads the pixels and image metadata, e.g. OpenSlide or Bio-Formats.
Previously, QuPath would make the decision for you but this wouldn’t always be optimal because some formats are supported by multiple readers in different ways. For example, an .ndpi file might open faster using OpenSlide - but if it’s a z-stack then you’d need to use Bio-Formats to access all the slices.
Now, if you know what you want you can take control by specifying the image reading library during import. (Choose wrong and the image might not open… but choose appropriately and it may open more quickly and more reliably. Or just let QuPath choose as before.)

Finally, QuPath is designed to handle very large, ‘pyramidal’ images. Such images contain data at with multiple resolutions stored in the same file.
QuPath is also designed for smaller microscopy images (mostly 2D).
But until now, it hasn’t worked particularly will with large images that aren’t pyramidal. To mitigate this, there’s now an option for QuPath to generate a ‘pseudo-pyramid’ if needed.

QuPath does still need to access all the full-resolution pixels at least once. Still, you can use this to substantially improve performance for moderately large images, e.g. 10,000 x 10,000 pixels. For even bigger non-pyramidal images conversion to a pyramidal OME-TIFF is a better idea.
Repair projects by finding missing/moved images
QuPath’s projects contain the following file paths (as URIs):
- Absolute paths to all images
- Absolute path to the project itself
That should all work fine so long as your images stay in exactly the same place.
The trouble is if images are moved or deleted, or you want to share a project with someone else who can’t access the images in the same way.
Previously, this meant that in QuPath you needed to manually edit the project.qpproj file to make things work again.
This started to improve in v0.2.0-m3. Now whenever a project is being opened, QuPath will:
- Check if all the absolute image paths match real files
- If a file is missing
- Check if the project has moved, and if so try relative paths to the missing images
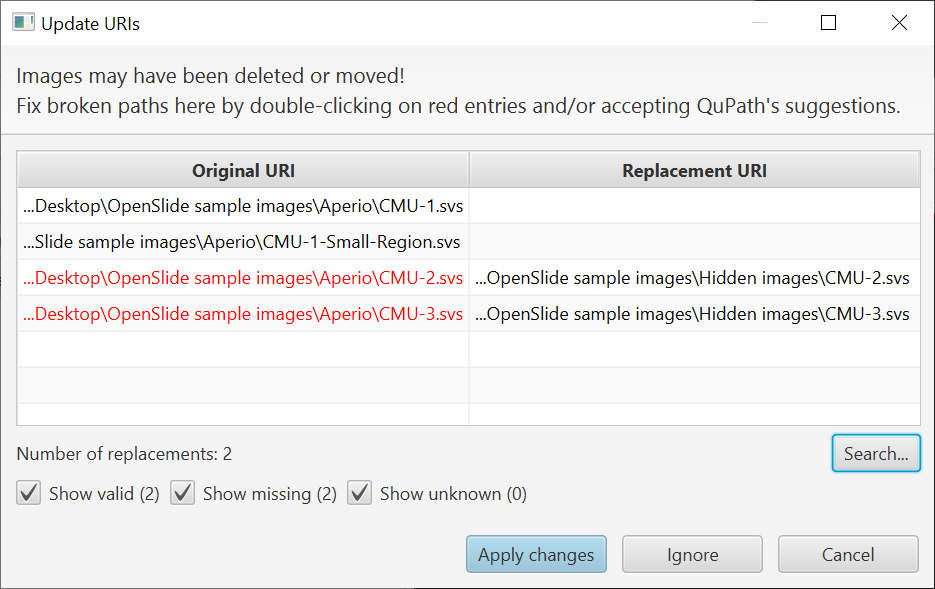
- Show a dialog for the user to fix any remaining broken paths / accept suggested changes
When the dialog appears you can fix a path by double-clicking on it and locating the missing file.
In practice, this only actually worked on Windows. In v0.2.0-m4 it should work on Linux and Mac as well - but it is still rather awkward if you have a lot of images.
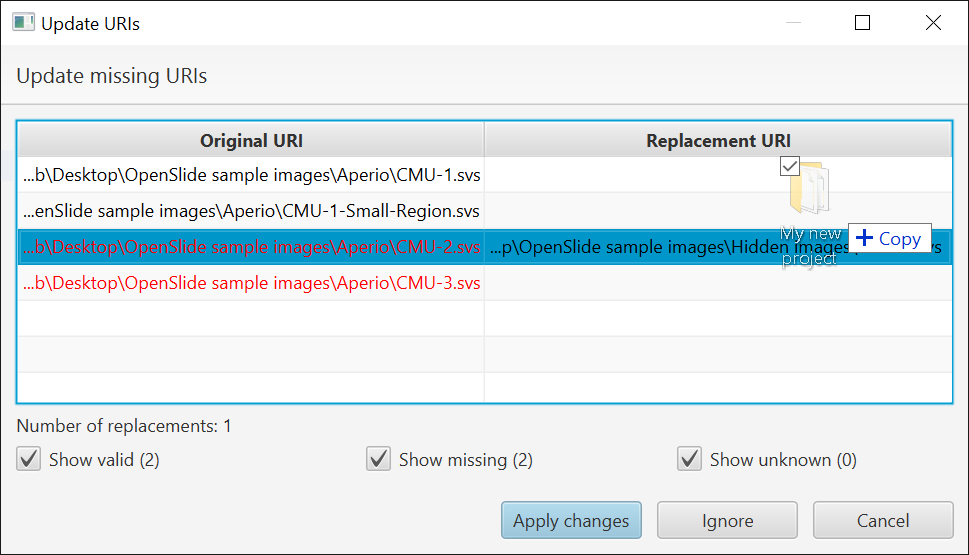
So now there’s a new button ‘Search’. This is for cases where multiple files are missing (perhaps all of them?) and you need to update many paths at once.
You can click on ‘Search’ and choose a directory containing the missing images. QuPath will then try to find all the files in the directory with names that correspond to those that are missing.
But actually it can be a little more useful than that.
You don’t really need to give it the directory that contains the images; you can also give QuPath a ‘parent’ directory. QuPath will then search recursively through sub-directories (up to a limit, currently set to 8 levels) for missing images.
This should ease the pain of working with QuPath projects across multiple computers, or when files move around.
New ways to expand lines (including tumor margins!)
An earlier post on this blog discussed how to Create annotations around the tumor.
Basically, QuPath gives options to grow, shrink, add and subtract areas, and by combining these it is possible to help analysis around tumor margins etc.
This worked fine for areas, but wasn’t really designed to work with lines.
The new Polyline tool introduced in previous milestone releases helps:

However, applying the Expand annotations to line/polyline annotations would expand in all directions - and ‘remove interior’ had no effect (since the line had no thickness):

This meant that if you want a ‘thick’ boundary, you would need to carefully draw a line along the middle of where you want the boundary to be - rather than at the edge of the structure being annotated.
Now, in v0.2.0-m4 two things have changed:
- There is an option to set the ‘line cap’ to be round (as before), flat or square
- If selected, ‘Remove interior’ will remove an approximately 1-pixel thick line
Changing the line cap to Flat gives a quite different expansion:

Combined with ‘Remove interior’, this is enough to make a separation.
You can then use Objects → Annotations → Split annotations…

…which allows you to separate the inner/outer expansion regions.

Then you can delete one if you don’t want it, and refine any weird bits that might have emerged (like at the left side on this image).
More control of Measurement Maps
The perceptually uniform colormaps added in v0.2.0-m3 can now be accessed from a drop-down menu.
Your preferred colormap is also remembered across measurements & when QuPath is restarted.
You can also now double click on the labels that show the min/max display range to specify exact values. This is particularly useful if you want to create figures with the same display range for comparison.

Improved memory management & image caching
Under the hood, QuPath’s method of caching tiles has changed substantially (now using a Guava cache).
Also, the amount of memory given to tile caching is now adjustable in the preferences.
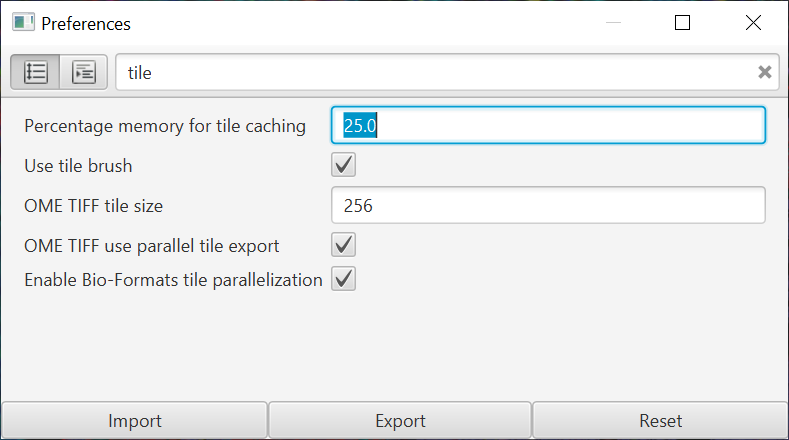
Previously, this was limited to 4 GB. This was plenty for most RGB images, but with multiplexed images it could fill up quickly. Now if you have a lot of RAM available, it’s possible to improve performance by having a much larger tile cache… which also helps when generating the OME-TIFFs as described above.
Many more improvements and bug fixes
There are lots of other changes and fixes, including:
- You can access scripts from a project directly through the Automate menu again
- Send region to ImageJ with overlay now only sends objects in the cropped field of view being sent (rather than lots of objects from anywhere in the image)
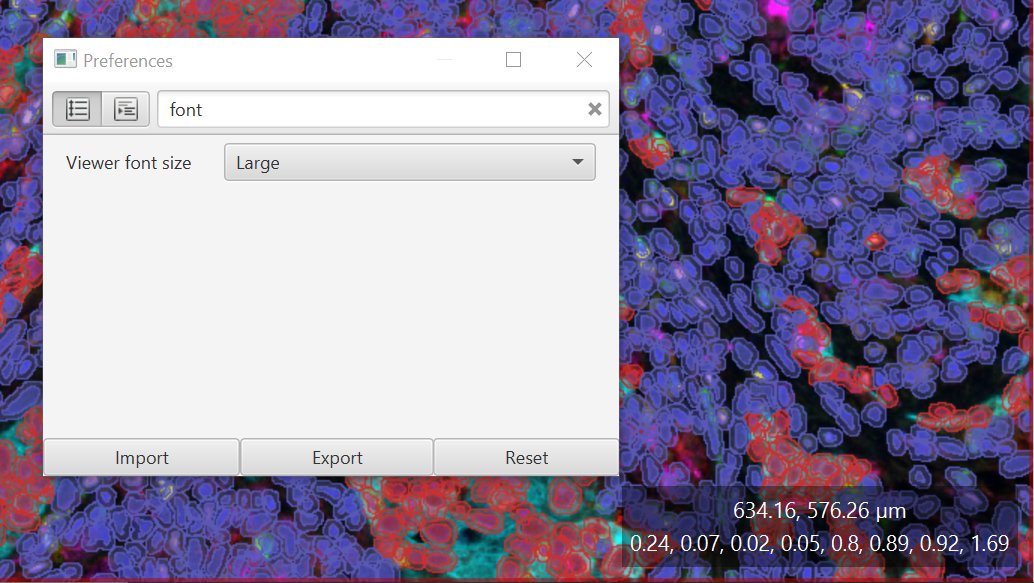
- The font size can be adjusted in the preferences for the cursor location label
- QuPath allows smaller regions to be extracted from images (down to a single pixel) - which helps with Send region to Image or adding intensity features
- Code formatting in the script editor is asynchronous… which can be considered better or worse. It crashes less anyway.
- A bug preventing SLIC superpixels from being generated as been fixed
For full details on what has changed, see the commit log.