Building QuPath
How to build QuPath from source & run from eclipse
Building software can be tricky, but hopefully this won’t be - thanks to Gradle.
The following instructions are for the latest version of QuPath (v0.2.0-m4 at the time of writing). Things won’t necessarily work quite the same way with older versions.
The following instructions assume:
- You’re starting from scratch
- You’re not an expert in building software
If you are an expert, you’ll know which steps you can skip or amend.
Step 1: Installing prerequisites
Install a Java Development Kit (JDK)
QuPath requires OpenJDK 11 (or later*). You can get this through https://adoptopenjdk.net/
During installation you may be asked if you want to add the JDK to your PATH. To make things easier, I do.
If you can’t (e.g. because of some other Java software needing the PATH set to something else) I’m afraid I’ll leave resolving that up to you.
-OpenJDK 11 vs. OpenJDK 13
At the time of writing, Gradle does not yet support OpenJDK 13. Therefore you’ll need OpenJDK 11 to start Gradle, even if you ultimately use OpenJDK 13 when building QuPath itself.
Download the latest JPackage
To create the QuPath installer, you’ll need jpackage.
One day, jpackage is likely to be part of the JDK, and everything will be simpler.
But for now, you need to download an early access build separately from jdk.java.net.
Extract the contents (e.g. right-click and unzip) to a folder of your choosing and remember where it is because you’ll need the path to that folder later.
Step 2: Get the QuPath source code
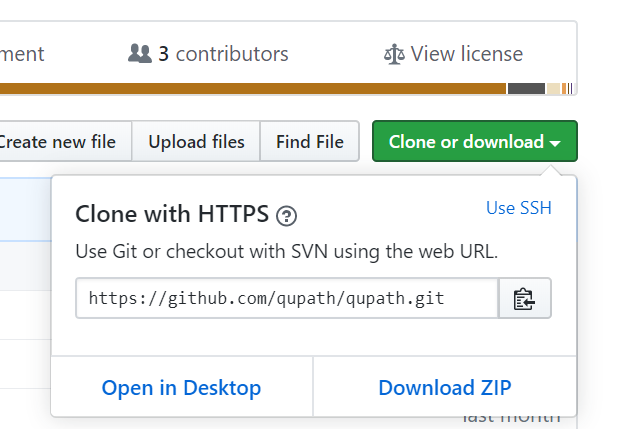
You can get the QuPath source code from https://github.com/qupath/qupath
If you’re using either Mac or Windows, the following steps may help.
- Install Atom (a text editor) from https://atom.io/
- Install GitHub Desktop from https://desktop.github.com/
- Press the Clone or download button at https://github.com/qupath/qupath and choose Open in Desktop
Step 3: Add a gradle.properties file
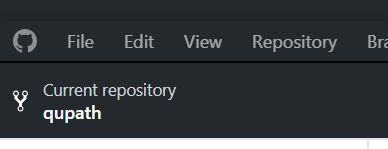
Go to GitHub Desktop, make sure that the ‘Current repository’ is ‘qupath’ and choose Repository → Open in Atom
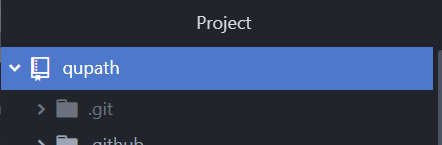
Under the ‘Project’ tab on the left within Atom, right-click on the top ‘qupath’ and choose New File.
When prompted to Enter the path for the new file type gradle.propertes

Inside gradle.properties, enter the following text
packager=/path/to/jpackage
where you’ll need to replace /path/to/jpackage with actual path.
Note that jpackage will be somewhere inside the folder you extracted earlier. On Windows, it’s the path to jpackage.exe you are looking for and what you need to type should look something like this:
packager=C:/Users/myname/Documents/jpackage/jdk-14/bin/jpackage.exe
If you want, you can add extra information to gradle.properties to customize how QuPath is built (or how quickly it is built), e.g.
// Essential!
packager=/path/to/jpackage

// Optional
org.gradle.parallel=true // If you are impatient
org.gradle.java.home=/path/to/another/jdk // If you want to use a different JDK to build QuPath (e.g. OpenJDK 13)
request-git-tag=true // If you installed Git & want to know *exactly* what was the last commit prior to building the software
Step 4: Build QuPath with Gradle
Open the QuPath source directory in a command prompt
One way to do this is to go back to GitHub Desktop and choose Repository → Open in Command Prompt
You may be asked if you want to install Git.
You don’t have to (I think…), but if you do then you’ll be ask a lot of questions during the installation. One of them is to choose a text editor, where you can select Atom.
Run gradlew
At the command prompt, type the following:
gradlew createPackage
for Windows, or
./gradlew createPackage
for MacOS and Linux.
This will download Gradle and all its dependencies, so may take a bit of time (and an internet connection) the first time you run it.
If all goes well, you should see a triumphant message that the build was successful.

Afterwards, you should find QuPath inside the ./build/dist subdirectory. You may then drag it to a more convenient location.
Congratulations! You’ve now built QuPath, and can run it as normal from now on… at least until there is another update, when you can repeat the (hopefully painless) process.
Extras
Variations & troubleshooting
The code above should create everything you need to run QuPath.
If you want an installer instead, you can use
gradlew createPackage -Ptype=installer
Note that for this to work you’ll need to install WIX Toolset.
Inevitably, things will go wrong at some point. When this happens, it’s worth running
gradlew clean
to clean up old files that could be causing trouble.
You can also combine the options, e.g.
gradlew clean createPackage -Ptype=installer
will clean first, build QuPath & create an installer all in one go.
Getting the latest updates
Once you’ve built QuPath once, updating it to use the latest source code should be much easier.
In GitHub Desktop, see the right-most button on the main toolbar. This serves two purposes: to Fetch information about the latest changes (from GitHub) and to Pull the changes down to your computer.

If the option is Fetch origin, and you press the button then if there are any changes to pull the text on the button will switch to Pull origin with info about the number of changes available.
You can press it again to pull those changes, and then rebuild QuPath using gradlew if necessary.

You can also use the middle button in GitHub Desktop to switch ‘branches’. Branches basically make it possible to have different versions of the code in development in parallel while trying out new changes.
The following screenshot shows QuPath where I have checked out a specific branch called ‘pete-m5’.

If the changes prove worthwhile, the changes in ‘pete-m5’ will be merged back into the ‘master’ branch.
Running from an IDE
You should be able to import QuPath into any IDE (e.g. eclipse, IntelliJ) that supports Gradle.
I personally use eclipse for QuPath development, which allows me to run the software in debug mode - and even change the code while it is running.
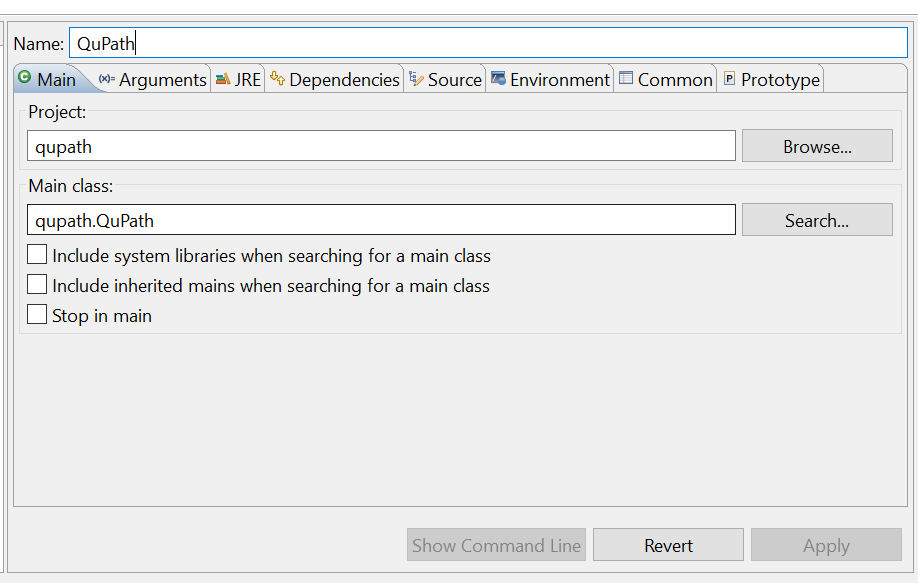
To do this, I use Run → Debug As → QuPath.
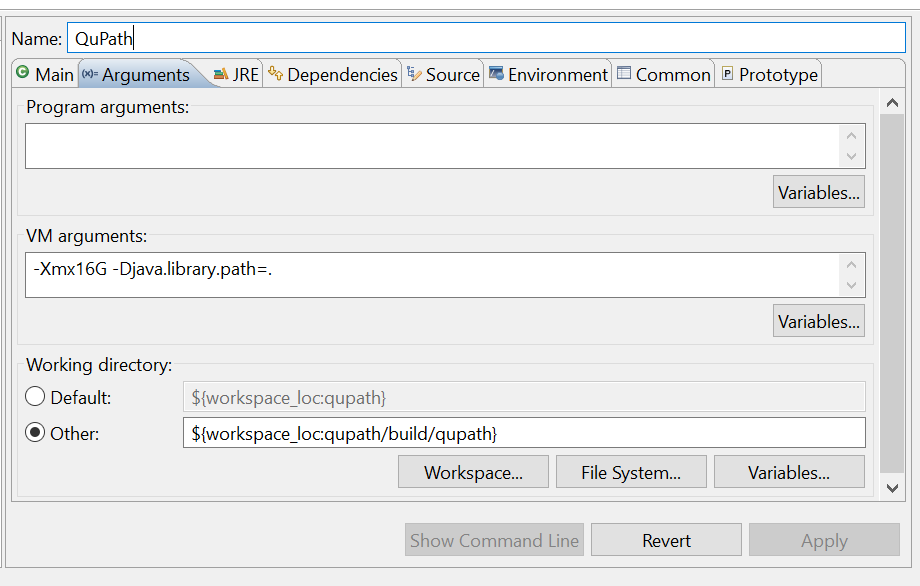
To make this option available, you’ll first need to create a debug configuration with Run → Debug Configurations….
Within this dialog, I use the following options to control the available memory and set the working directory/Java library path.